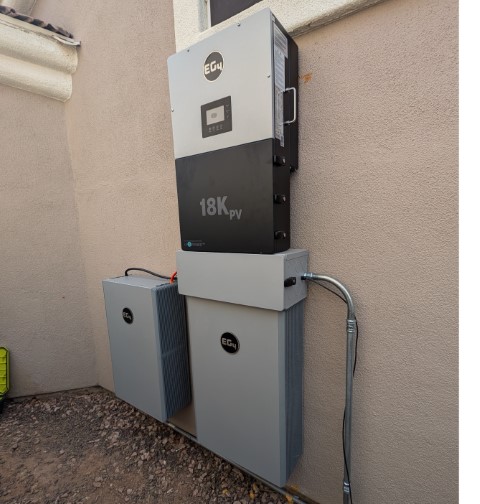
I finally installed this EG4 battery and inverter to power my house. You can read parts 1 and 2 here if you’re curious why I started this project. I did end up purchasing two batteries instead of one. A single inverter can support up to three batteries per the manufacturer. In my current configuration, I have a 28.6kWh capacity(2 batteries in parallel) which so far appears sufficient to support my house in the peak of July for 3 hours.
Too Small
My first attempt at building this project was with one battery with a 14.3kWh capacity. Remember the original goal was to eliminate all energy from the grid between 3-6 PM when energy is very expensive. You can see below in a couple of examples I was using too much energy and the battery would die. Then I would pull energy from the grid as indicated by that red bar. This was the last week before I installed the second battery.

Just Right
Here is the week after installing the second battery giving me a 28.6kWh capacity.
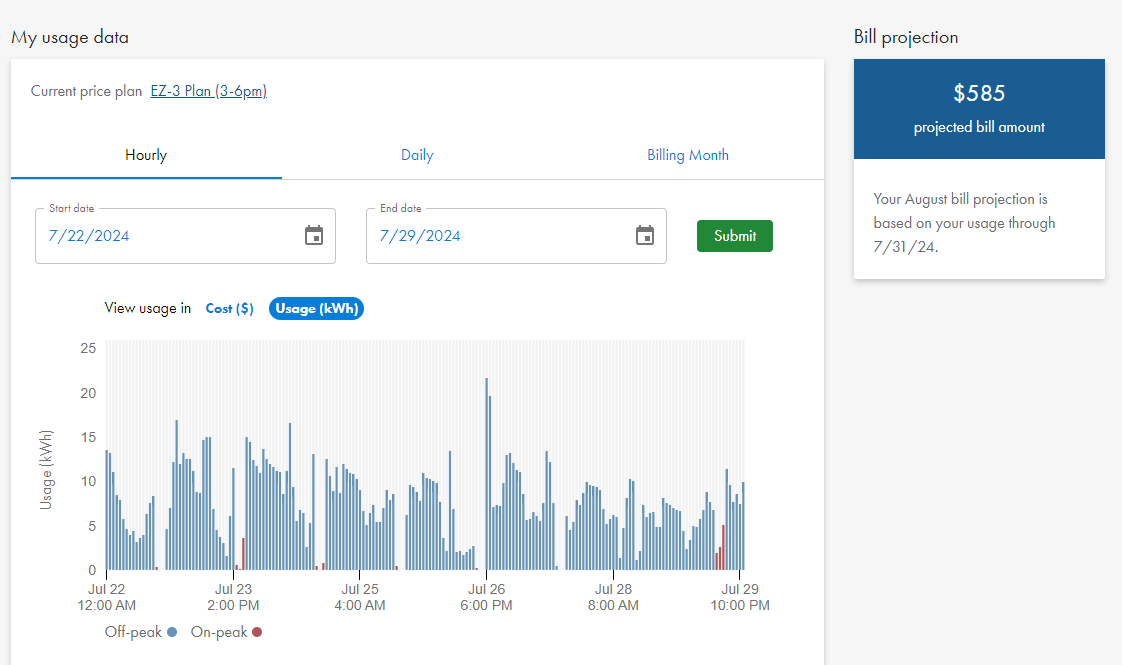
There is still some red in here when I was testing a few things and the battery was off. Also on the 29th I set the state of charge (SOC) level too low and the battery breaker tripped. EG4 recommends not depleting these any less than 20% SOC. This caused me to lose the battery discharging that entire day as indicated by the 3 red bars.
The EG4 interface was a bit tricky to understand at first. But essentially you just want to configure it to discharge the battery during certain hours and stop with the state of charge gets to a certain level.
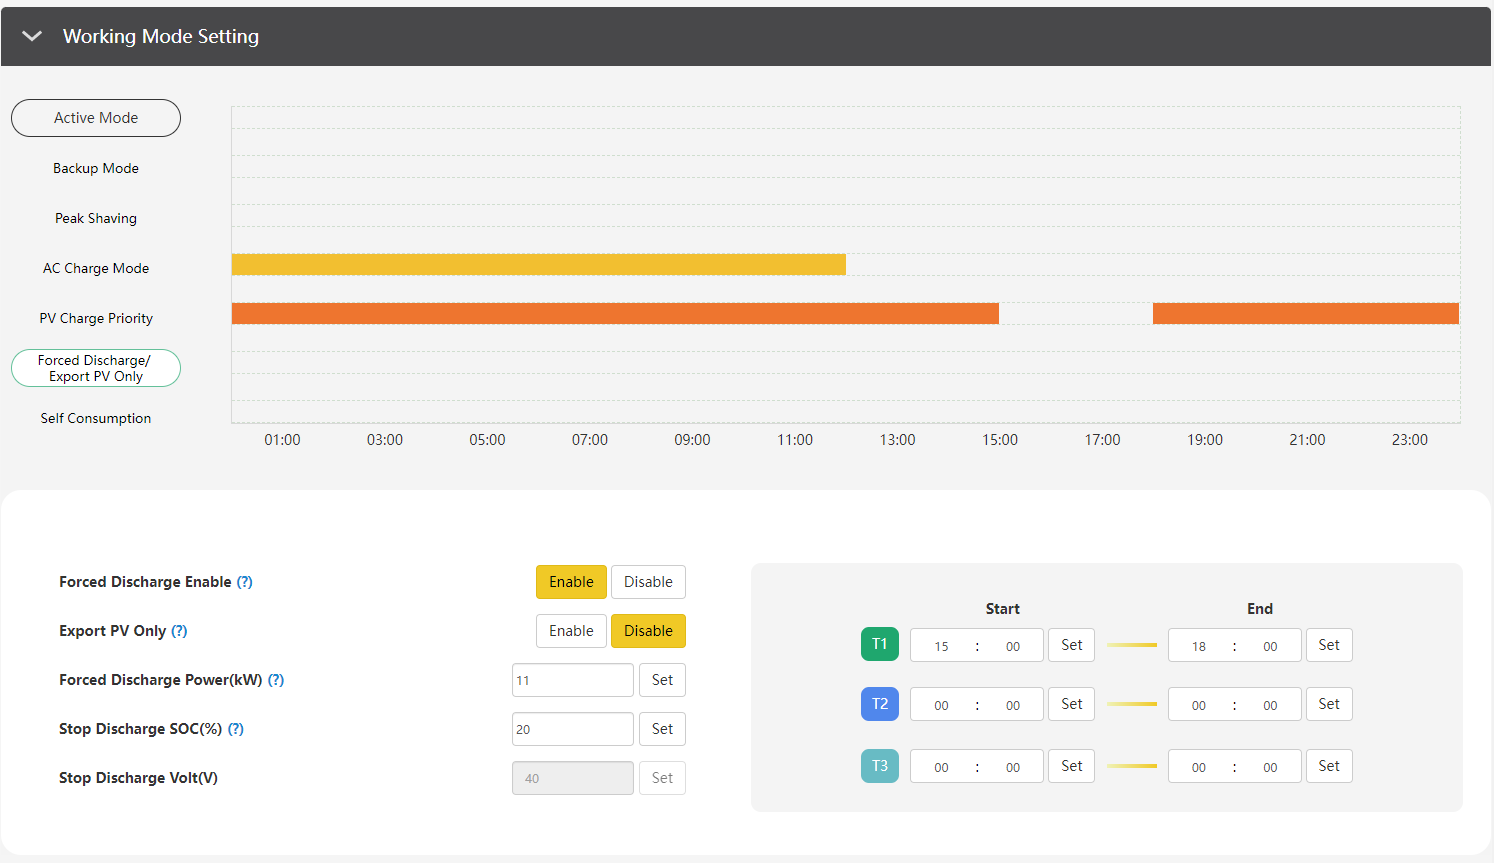
The SOC cut-off level can also be configured here.
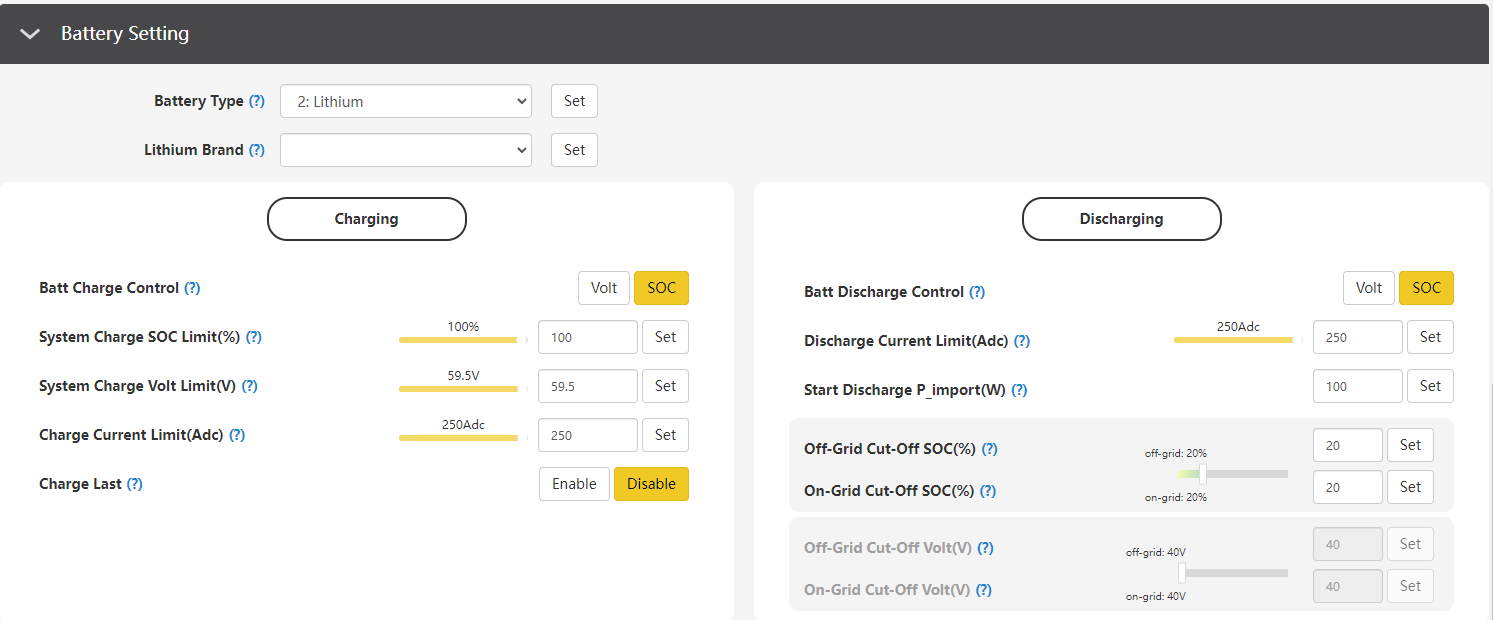
We can then configure the battery to charge starting at midnight
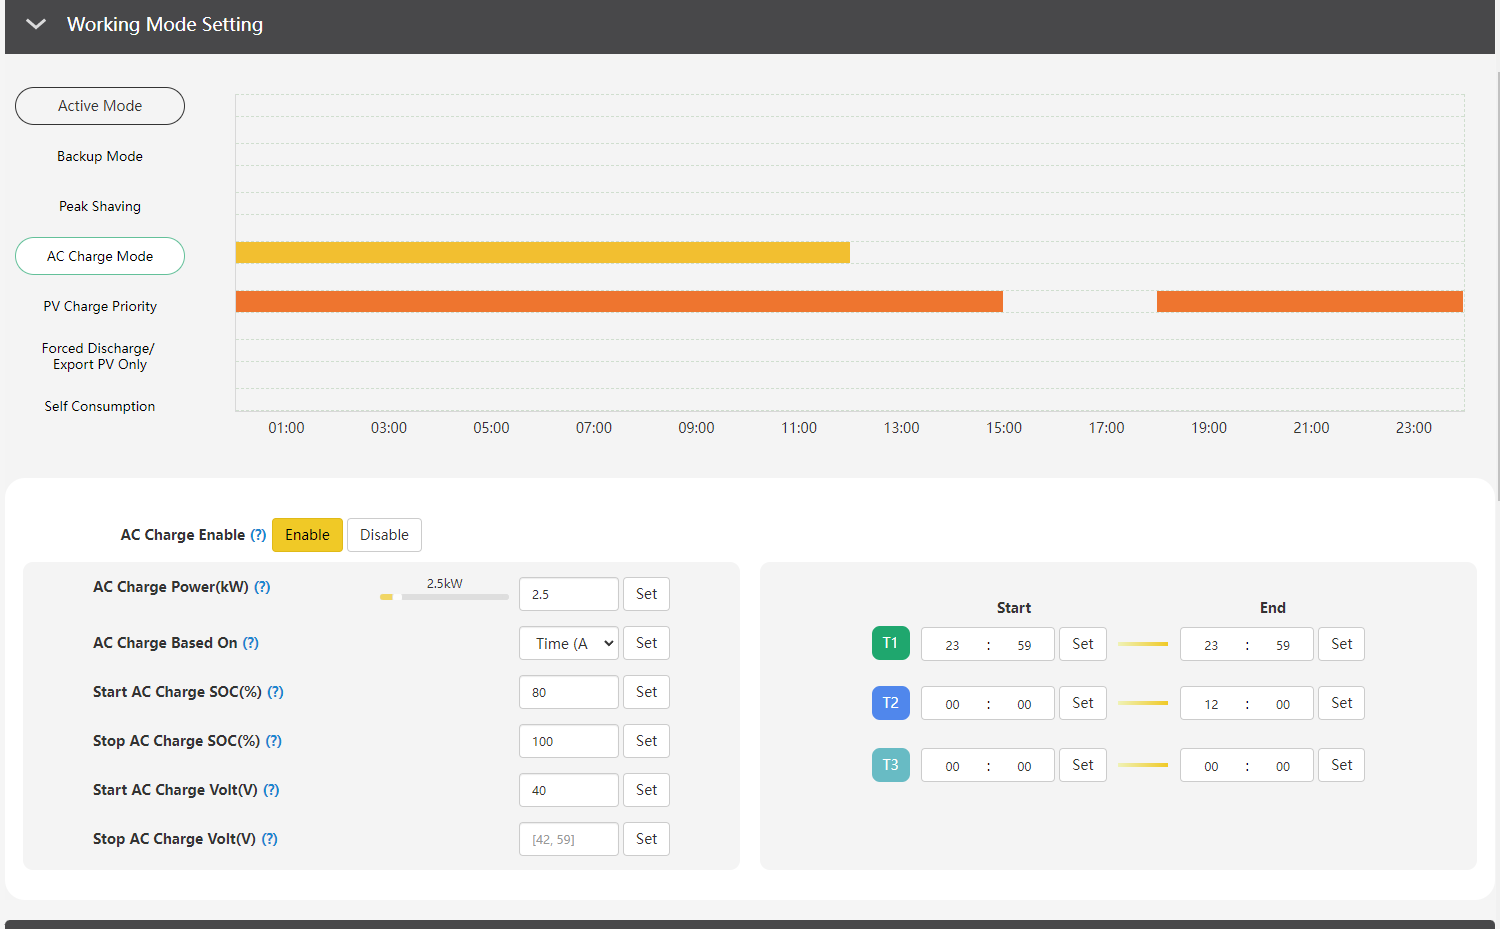
So essentially all the battery is doing is discharging between 3-6PM and charging at midnight.
Measuring current
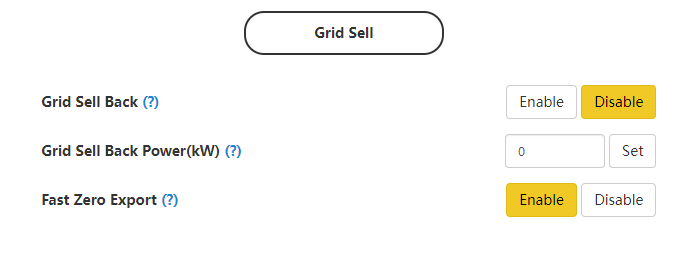
This inverter also comes with CT clamps. You stick both of these on each leg of your 220v from your electricity provider. This allows you to monitor the amount of electricity you’re using for your entire house so you don’t back feed any electricity into the grid. You can check these options below to make sure the inverter does not send any electricity upstream.
Cost
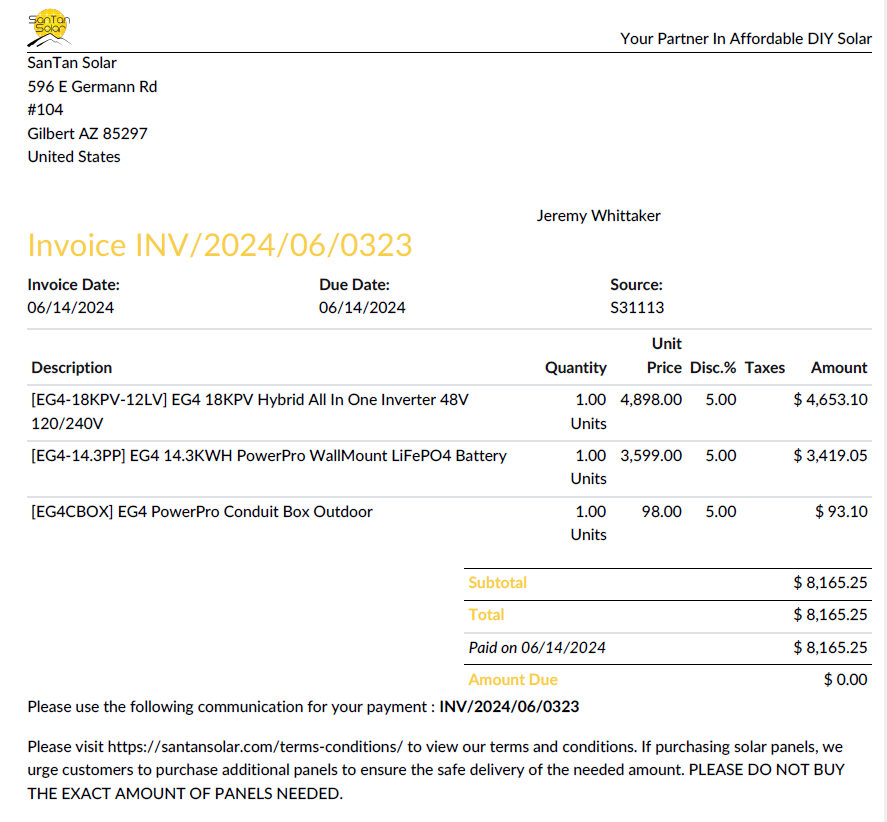
Because I had to purchase two batteries and an inverter the cost was a bit more than I anticipated. My total cost for the main components was $11,683.30. I bought it from a local company in Arizona, San Tan Solar. The Residential Clean Energy Credit gives you 30% off the cost bringing the final number to $8,178.31 for 28.6kWh of battery and an inverter. The ultimate goal is to offset all of my energy from 2-8 PM with the solar and the current battery. This is just phase one of a larger project that will include solar. However, now that the inverter is installed I am ready to simply plug in solar panels.

Savings
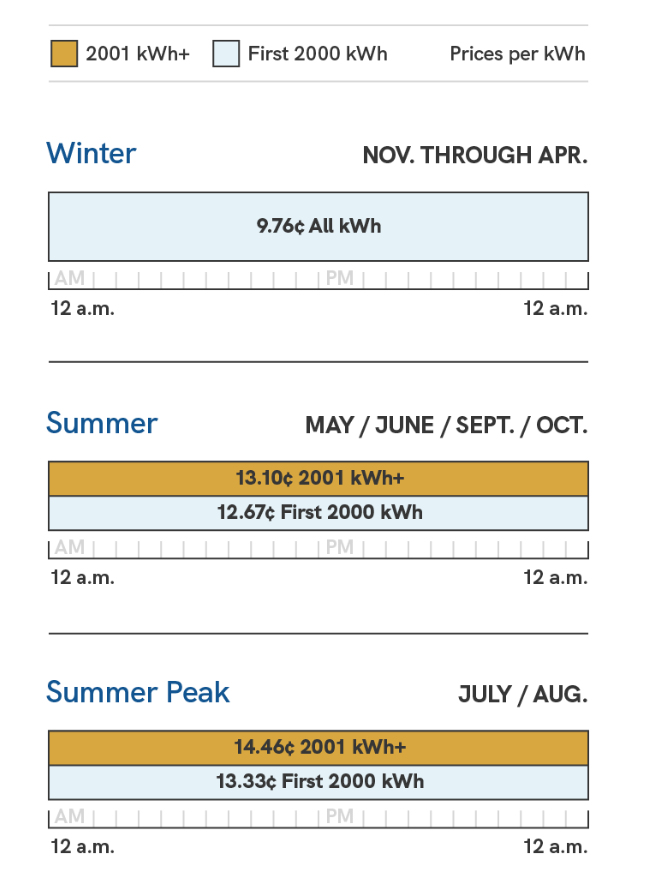
The savings will be a little difficult to calculate until I’ve generated some usage statistics in my new house. However, below is SRP’s standard rates. We can now switch to the SRP 3-6 program and get all of our energy to about 10c per kWh which is a 30-40% savings. Again, the ultimate goal is to convert this into a solar/battery setup and offset all of our usage from 2-8 PM. This will drastically cut costs as all of our electricity will then be 5c per kWh reducing the cost 60-70% per kWh.